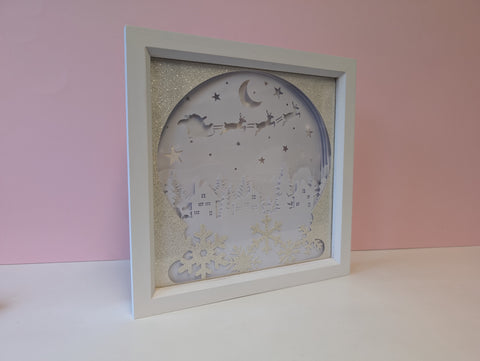
Looking to add a bit of festive magic to your holiday décor? 🎄 In this tutorial, we’re making a Christmas light-up layered shadow box that’s perfect for adding a warm glow to your home. Using layered cardstock, fairy lights, and a shadow box frame, we’ll create a 3D scene that looks amazing in any room. So, grab your crafting tools, and let’s bring a touch of Christmas cheer to life!
Materials You’ll Need
For this project, I’m using high-quality cardstock from my sponsor, Paper Cutz, which works great for creating clean, intricate layers. Here’s what you’ll need to make your shadow box:
- Glass shadow frame (You can make a version without too!)
- White and glitter cardstock from PaperCutz for layers that sparkle! ✨
- Foam spacers to add depth between layers (frame version only)
- Double sided tape to secure each layer
- Fairy lights for a cozy, glowing effect
- Tracing Paper (free-standing version)
- Battery operated candle (free-standing version)
Silhouette Cameo and Canva for designing and cutting the layers
Step 1: Designing Your Layers in Canva
Let’s start by creating a layered design in Canva. Think snowy trees, stars, or a simple winter village for that festive feel.
Create the Layers: Design each layer with enough space for the fairy lights to shine through. Stick to clean, bold shapes that will be easy to cut and assemble.
Save and Export: Once your design is ready, export each layer as a separate image. This will make it super easy to cut out on the Silhouette Cameo.

Step 2: Cutting Your Layers on the Silhouette Cameo
Time to bring your design to life by cutting it out on the Silhouette Cameo! Import your design, and then trace each layer. Load your cardstock and select the right settings for plain and glitter cardstock.
Cutting Tips: For glitter cardstock, use a slightly higher blade setting for a clean cut. I use
Blade Depth 6
Force 33
Speed 3
Passes 2
Overcut on
For 160gsm cardstock I use
Blade Depth 2
Force 27
Speed 4
Overcut on
Passes 2

Step 3: Assembling the Layers
Now, let’s bring the layers together to create that 3D effect!
Framed Version
Add Foam Spacers: Place foam spacers between each layer to create depth. This gives the shadow box that lovely layered look when it’s lit up.
Align the Layers: Stack each layer carefully, aligning edges to keep your scene looking neat.
Secure with Glue: Use your double-sided tape to attach the layers without warping the cardstock.

Free-Standing Version

Step 4: Adding the Fairy Lights - Framed Version Only
This step adds the magic! The fairy lights will give your shadow box that cozy, glowing effect.
Cut a backing: Cut copy paper that is the same size as your layer width and height to secure the fairy lights to.
Position the Lights: Lay the fairy lights on the copy paper and hold them in place with masking tape.
Wire Placement: Make sure the wire end near the control box finishes near a bottom corner so it can be fed through the backing.

Step 5: Final Assembly and Display
Framed Version
Place the Design in the Frame: Carefully insert your layered design into the shadow box frame, checking that everything is secure.
Free-Standing Version
Tracing Paper: Carefully secure your tracing paper to the back of your shadow box with glue dots.
Tips for Customizing Your Christmas Shadow Box
- Personalize the Scene: Add a name or special date to make this a unique gift.
- Use Colored Cardstock: Try using a mix of red, green, or gold cardstock to enhance the Christmas feel.
- Experiment with Different Shapes: Snowflakes, trees, or ornaments make great options for holiday-themed layers.
Conclusion
And that’s it – a beautiful Christmas light-up layered shadow box two ways, that’s perfect for the holiday season! 🎄 This DIY project is an easy way to add a handmade touch to your décor, and it’s so satisfying to watch your design come together with each layer. Don’t forget to share your creations on social with #ChibiChiDesigns – I’d love to see what you make!
FREEBIE CUTTING FILE
If you'd like to make your very own mini free-standing light box, you can find the cut file HERE
Please remember this is for personal use only and should not be profited from.
To see the YouTube video for this tutorial, visit my YouTube channel
